In the previous article we talked about the uses of surveillance camera and many of the features. In this article we will talk more about picking out cameras, installing them and using them.
For most of my installations I choose a 720 camera that can record directly to the camera, to a NAS or to an FTP site. These camera also can stream directly from the camera to a computer, phone or tablet anywhere in the world. They include an array of IR lights on the front and can connect to either wired or wireless networks. I also like the fact that the cameras are under $50 each (but do not come with a micro-SD card for recording either).

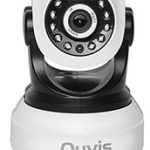
My preference at the moment is for the Ouvis Veezon VZ1 Wireless camera available from Amazon. These are easy to set up, have no monthly fees for anything, and so far have just worked right out of the box as you would expect.
If you need something with a higher resolution try the Amcrest IP2M-841 ProHD 1080p cameras also from Amazon for just under $100 each. These are also very easy to set up and work well. In fact, these are extremely similar to the Ouvis cameras right down to the mount for the wall.
Installation
Installation of these types of camera is a pretty straightforward and simple process. Years ago installing a camera system was a much more difficult process involving running power for each camera, installing power bricks near the DVR, linking the cameras to the DVR and setting a ton of settings just to get the things to work. That is all gone.
Once you have all the pieces out of the box you need to connect the camera to power with the included power cable and then connect it to your network with the included networking cable. The easiest way I have found to install these is with the free app on a IOS or Android tablet or smartphone. Simply use your phone or tablet to scan the QR code on the box to download the software you need. If you do not have a QR reader for your device those are freely available and you should really get one and install it, they will save you a lot of time on a lot of things.
If you purchased a micro-SD card install it in the slot on the rear of the camera now. The Sandisk Ultra 64GB MicroSDXC UHS-I card works excellently in these cameras.
When the camera is first plugged in it takes a minute to check the motions of the motors and moves all the way to the left, then to the right, then up, and finally all the way down. Once this initialization is complete it moves to the center position and is ready to go.
Open the app and tap the add device button at the very top. Now tap the Scan QR Code button near the bottom of the screen. This will open the apps internal QR code reader. Scan the QR code located on the bottom of the camera. You can now rename the camera, change the username and password to log into the camera, etc. Tap Done in the upper right. The camera now appears in your list.
Now click the gear icon to the right of the camera you just set up. Tap on WI-FI setting and then on the name of the wireless network you want to join. Enter the password for the wireless network and then click on Done in the upper right.
The camera now should power off and go through its initialization routine again. While this is happening you can disconnect the networking cable. Once the camera is ready see if you can connect to it and view the video. If so, your wireless networking is working correctly.
If you bought a micro-SD card for recording tap on the gear icon to the right of the camera and then tap on SD card setting. Use the SD card formatting option at the bottom to format the card in the camera (this is a must). Once that is done you can turn on Record coverage, Audio recording and/or Timer recording. Click Done in the upper right when finished.
Now tap on the Device time setting and make sure your time zone is set correctly, Turn on Use NTP Server Auto Correct. Now tap Done in the upper right.
Your camera is now set up and working and just needs to be put where you want it.
You can either set the camera on a flat surface or you can mount it to something such as a wall or ceiling. Mounting it makes it more stable and prevents animals such as your cats, dogs or birds from messing with it. Even if you set the camera up high all something has to do is push against the power cord down near the floor and that can move your camera, or worse send it crashing to the floor. Better to mount it if you can.
Mounting the camera is easy as well. The mount uses two screws to mount to a wall, ceiling or other fixture. This in turn has a thumb screw that twists into the bottom of the camera to hold it on the mount. The kit includes the needed screws and two sheetrock anchors. I rarely use the included hardware as the screws are typically too short for anything but thin sheetrock and the sheetrock anchors are far too cheap.
Once you decide on where to put it I use slightly bigger wood screws if I am going into wood (or longer wood screws if I am going through sheetrock into a stud) or longer screws with better sheetrock anchors if I am going into sheetrock.
If going into sheetrock I find a Phillips screwdriver slightly smaller than the maximum diameter of the sheetrock anchors. While holding the mount where I want it I use the screwdriver to make two holes in the sheetrock. Now I remove the mount and insert the anchors into the holes. Since the holes were slightly smaller than the anchors I usually use the blunt end of the screwdriver handle to tap the anchor all the way in. Now I put the mount back in place and secure it with the screws.
Using the knobs on either side of the mount I loosen the mount so that the two pieces move freely. Be careful not to unscrew the knobs all the way. Now I place the camera on the mount and tighten the thumbscrew that attaches it. Lastly I adjust the mount to put the camera where I want it and tighten the two knobs I previously loosened.
Now we run power to the camera and plug it into the wall. Sometimes power is too far from the camera and we need a longer cord. Fortunately they make cords for extending this reach which come in lengths from six feet to fifty feet. These cords are 1.3mm x 3.5mm male to female cords and are available on Amazon. I have seen both black and white cords which can help hide them against painted walls etc.
If you have a camera made for indoors you might be tempted to point it outside through a window. This makes it far easier and cheaper to do that to have an actual outdoor camera. This works very well, right up until it gets dark and the IR lights turn on. These lights reflect off the glass of the window and completely blind the camera. As we mentioned earlier turning off these lights solves this problem but then you get no illumination for the camera and probably can’t see much if anything.
Fortunately they make outdoor IR lights that solve this problem. You can have your camera indoors and one or more lights outdoors. This also allows you to use a bigger light, or multiple lights to illuminate a larger area than the camera alone could do. This also has the advantage of keeping your camera inside where it is less likely to be disabled. If someone can not get to the camera without breaking in, and they are being watched while they break in, they are less likely to do it in my opinion.
That’s it, you are done. You can add these cameras to other devices just by installing the software on whatever device you want to view the video on and then using the add device button just like you did on the initial installation. You will not need to do the WIFI configuration or SD card formatting, just the first part where you scan the barcode to add it to the program.
They also make software for your computer as well which can be freely downloaded. This software makes it easier to adjust some setting and view video. Check the instructions included with the cameras for installation.
Using the cameras
To view the video live simply launch the app on any device or computer and then click on the camera you want to view. You can swipe left, right, up and down to move the camera or pinch to zoom (although these cameras use digital zoom, not optical).
The first thing you need to do is make sure the cameras are in focus. View a camera and on the tap the screen to get the icons to come back up. Tap the one that looks like a TV or computer monitor and then tap HD on the menu that pops up. Now tap anywhere on the screen without a menu or icons to make the menu go away.
On the front of the camera lens is a black and silver ring. Rotate this ring back and forth while looking at the video feed on your device until you get it as sharp as possible. Your camera is now in focus.
If you have mounted the camera upside down (which is a very good option in many cases) you will need to invert the screen and then reverse it. To do this there are four icons at the top of the video screen. If the camera is upside down you need to tap on the right two icons turning them green. If you have the camera mounted sideways you may need to tap on a different icon or icons. Experiment, it won’t hurt anything.
My favorite feature is when viewing the video from a camera on my iPad there is an arrow on the far left side. Tapping this brings up a list on the left of all my cameras and a four section grid on the right. Tapping on a camera on the left adds it to the grid on the right. Once four cameras have been selected I can click on the arrow again and I now can watch four cameras at a time. This works on my phone as well but is not as useful.
Of course you can do the same grid on a computer and that is very useful but honestly the majority of the installs I do, the customer will be watching on their devices and not their computers.
The last thing I want to cover is how to watch pre recorded video. Let’s say something happened yesterday at around 2pm and you want to see what it was. Open the app and on the very bottom of the screen select My messages. Now select the camera you want to watch. Wait. You should now see a chronological listing of video clips. As you scroll down you go back in time. When you see the one you want just tap on it and it will start playing. Its that simple.
There are a ton more features but these are the ones you will be using immediately. Other cameras have similar features and work in a similar fashion. Even if you choose different cameras than these this should give you a great start on setting them up.
One final note. If you are using the camera for security you might want to invest in some stickers to place in strategic areas around your home. On the front door and on obvious windows would be excellent. This makes sure people know they are being watched. You can even augment your real cameras with very inexpensive fake cameras (pay a few dollars more and get realistic ones) to make it seem like more areas are being recorded.
Good luck and I hope you have fun with your new cameras!
Thank you very much for the very informative information on these cameras. I just ordered 3 of them for my house, along w/ the SD cards. I’ll be referring back to your site for my set-up, of course.
You have the BEST information! I currently have the ARLO cameras, but I can’t get the type of resolution I need with them. After checking out the Ouvis veezon VZ1 Wireless WiFi 720P HD Pan Tilt IP Camera (Day/Night Vision,2 Way Audio, SD Card Slot, Alarm, Mobile Android/iOS/iPhone/iPad/Tablet), it looks like it will work just great for my needs!
Thanks again and can’t wait to get my new video surveillance started!
Ginger