So you downloaded (or had it magically appear like me) the new Google Drive for Desktop to use as the “new and improved” Backup & Sync only to find that it requires additional setup and then installs a G: that you didn’t ask for and can’t remove. Welcome to the new Google Malware!
When the new program first “appeared” on my computer I thought it had been installed with another installation, pretty much a drive-by installation. After it appeared on a second computer I got the point. Google was installing it on all computers that were still running Backup & Sync.
I hopped on chat with my Workspace support and was told it was just an update, and that I had agreed to automatic updates when I accepted the End User License Agreement. When I pointed out that the Google documentation on their website differentiated the two as two completely separate products, and then pointed out that other Google documentation said that as of October, current users of Backup & Sync would simply not be able to log into that service anymore, the representative didn’t know what to say.
It seems that Google got tired of waiting for the end-users to make the switch and just decided to make it for them. Typical.
The first issue is easy enough to fix, setting the program to work the way Backup & Sync did instead of the way Filestream did.

Click on the Google Drive icon in your system tray and then click on the gear icon in the top right. Now select Google Drive in the upper left and it should show you the screen in the image above.
Select Mirror files as shown above. Note that under Stream files it says you access files from a virtual drive on your computer while under Mirror files it does not. Even if you select the Mirror files option it does not disable the virtual drive, we will get to that in a minute.
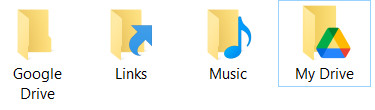
If you look in your files you might notice that this program doesn’t remove the old Google Drive folder you had, it just made a new one, then downloaded all your files again. Now you have two copies. Be sure that everything is there and then delete your old Google Drive folder. Both folders are located at c:\users\<USERNAME>\ by default so in my case “c:\users\allan\Google Drive\” was my old location and c:\users\allan\My Drive\” was my new location.
Now we need to deal with the G: drive that shows in in file explorer. As far as I can tell there is no way to just remove it. You cant right-click and do anything. You can’t eject it. You can’t go to PowerShell and “remove-psdrive -force G”. Nothing.
What follows is messing with Windows system files, use this information at your own risk. I take no responsibility for what it may do to your computer.
So I went into the registry to HKEY_CURRENT_USER\Software\Google\DriveFS and there was a key PerAccountPreferences. That key contained the value:
{“per_account_preferences”:[{“key”:”108363960670748394204″,”value”:{“mount_point_path”:”G“,”photos_upload_screenshots”:false,”photos_upload_raw_files”:false}},{“key”:”YWxsYW5AcGFwZXJiaXJkdGVrLmNvbQ”,”value”:{}}]}
Note the G in bold, roughly in the center. I changed that to A as I do not have an A drive in my computer. If you do, change it to B. My code then looked like this:
{“per_account_preferences”:[{“key”:”108363960670748394204″,”value”:{“mount_point_path”:”A“,”photos_upload_screenshots”:false,”photos_upload_raw_files”:false}},{“key”:”YWxsYW5AcGFwZXJiaXJkdGVrLmNvbQ”,”value”:{}}]}
Exit the registry editor.
Now we use Windows’ group policy editor to hide A drive. If you are using Windows Professional simply press WIN + R and type gpedit.msc in the run box. Press enter and navigate to User Configuration, Administrative Templates, Windows Components, and File Explorer (if using Policy Plus mentioned below use Windows Explorer instead of File Explorer). You should see Hide these specified drives in My Computer. Click on that, select Enable on the left, and then in the drop-down box select Restrict A and B drives only. Save that and exit the group policy editor.
If you are not running Windows Professional, download Policy Plus from https://github.com/Fleex255/PolicyPlus/releases and run it. Navigate to User, Windows Components, File Explorer, and on the right double click on Hide these specified drives in My Computer. Click Enabled on the left, and then in the drop-down box select Restrict A and B drives only. Click Apply and OK at the bottom.
Now open a command prompt and type GPUPDATE.EXE and press enter.
The virtual drive Google installed for no apparent reason should now be gone!