Ever wonder what exactly is inside your monitor and how it works? With the majority of computer monitors these days being LCD (Liquid Crystal Display) let’s have a look inside one and see what makes it tick.
I should warn you first, do not take a monitor apart unless you are experienced with this type of electronics. Monitors, even the newer ones, can discharge a large amount of electricity which can do things ranging from tickling your finger, all the way up to and including stopping your heart. Unless you know what you are doing, don’t take chances.
Oh, and don’t stick your hand or foot underneath a running lawn mower either!

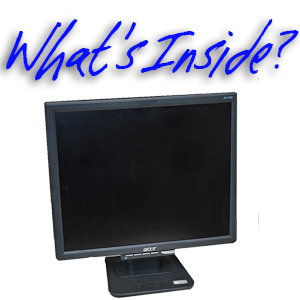
We are going to dissect this old 17″ Acer monitor that has decided to quit working. Looking at the rear there are no obvious screws until you look at the bottom and notice the two recessed screws, one on each side of the base (you can only see one of them in the image above).

With the rear cover and base removed we see the image above. Four screws hold the rear assembly onto the back of the screen. This assembly has the plugins for both power and video. Removing this assembly reveals the following two electronic boards:

The board on the left is what creates the image you see on the screen. The board on the right is the power board and it changes the 110vac power from your wall into the various DC voltages needed to make the screen work.
Upon inspection of the boards I find out why the monitor no longer works….

These two capacitors are swollen. This means that the tops are no longer nice and flat, but instead are rounded as the fluid inside of them has expanded. If you look very close you can see right in the middle of the X on top of them is a little discoloration. This is actually fluid trying to escape.
Capacitors that are damaged like this cause voltage problems and typically will cause the unit not to turn on at all, to turn off after a period of time, or to malfunction while running.
Some people wonder why we don’t just fix these and move on, and we certainly could. The problem is that once you factor in labor and parts, you have a several year old monitor that is worth about $50 on eBay and you have to charge $100 to fix it. Not to mention the fact that even if it works, the odds are that something else will fail shortly thereafter and the client will want you to fix the new issue “under warranty”.

Once the electronics are removed off the back you can easily remove the metal frame which houses the components shown above.
On the bottom we have the white screen with the black border. This also has the two sets of wires on the top. This screen is actually two fluorescent flat panels joined in the center. If your screen works but you can just barely see it if you shine a light on the front, then this fluorescent panel, or backlight, has gone out.
If half your screen works right and the other half is very dim, then one of the two backlights has gone out.
The black screen on top of the backlight is the actual LCD panel. All those cables on the left side and bottom are what supplies voltages to the specific pixels on the LCD panel changing their colors. The backlight shines through this panel and the light that you see is the blacklight plus whatever color the pixel is on the LCD panel the light is shining through.
For white, the LCD panel leaves the pixel alone, for black, it applies all the colors, or it can change any pixel to any color and make an image.
If your monitor turns on but you get nothing but a white screen, then the LCD is not functioning.
Now you know, what’s inside an LCD monitor!